Simulation of ALU TestBench
****MUST
READ****
There is currently a library mapping issue
that will prevent you from being able to compile your design. In order to fix this, you must go to the
‘Project Manager’, right click on ‘hds_package_library’
and select ‘Edit Library Mappings’.
Change the ROOT directory from its default setting to I:\1502. The HDL and HDS folders should now read
I:\1502\hds_package_library\hdl and I:\1502\hds_package_library\hds
respectively.
Now, you should be able to generate and compile all of
the necessary VHDL from the top most level of your design ![]() .
.
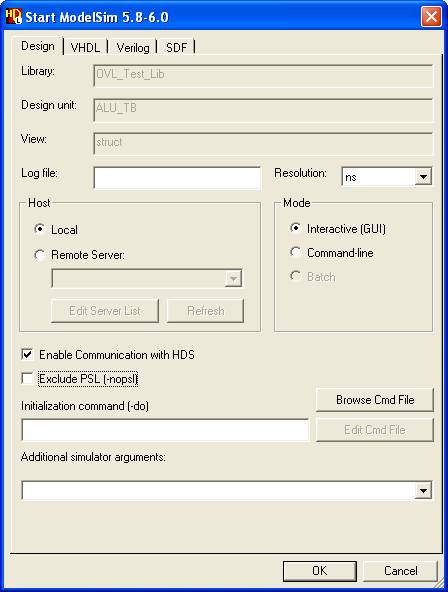
When the Modelsim startup
screen comes up, make sure that “Exclude PSL (-nopsl)”
is NOT checked.
After you have added the signals to
the waveform, type ‘view assertions’ into the console window. This will
display a table of all of the assertions you have created as shown below.

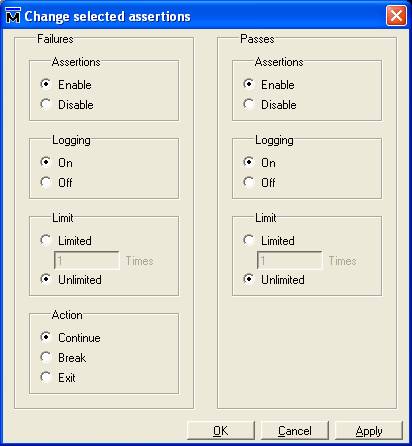
Select all of the assertions (Shift-Click). Right click on the assertions and select the
‘change…’ option. You will see the
pop-up shown below. Make sure that both
Failure and Pass assertions are enabled and that the limits are set to
unlimited.
Drag and drop the assertions into the waveform, this
will allow you to see the time at which they were evaluated. In order to
simulate/verify your testbench, you will need to
force the clock and reset signals within the simulator and let it run for many
clock cycles. The longer you let it run,
the more coverage you’ll have.
Type this command into the Modelsim
console window to make the ‘clock’ signal oscillate:
force -freeze clock 1 0, 0 {50 ns} -r 100
Notice that the actual clock period does not matter,
because our combinational logic is infinitely fast within the simulator.
And don’t forget reset_n (it
is an inverted signal):
force reset_n 1
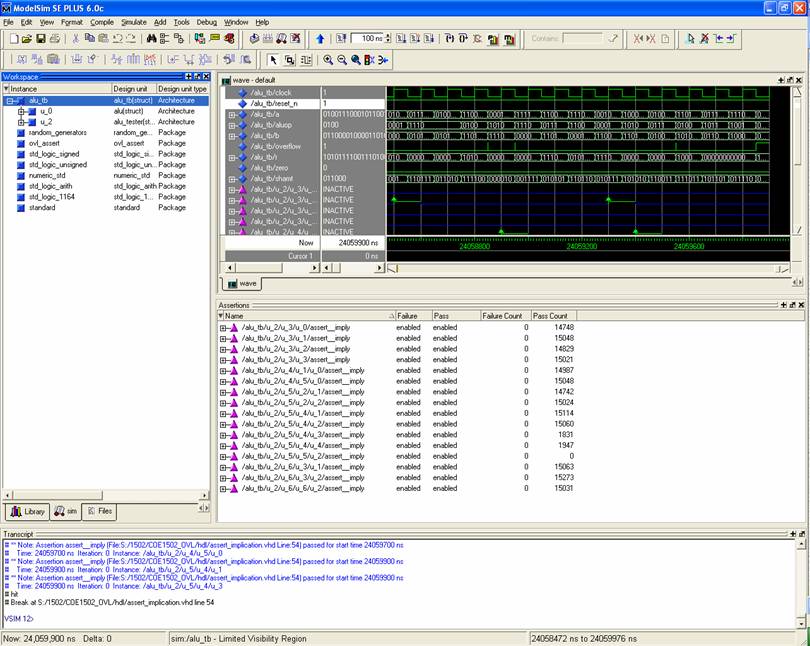
After you have finished simulating, your Modelsim window should look something like the following
figure. The ‘Failure Count’ and ‘Pass
Count’ columns indicate how many times that specific assertion
failed/pass. In order to make the
results easier to interpret, you should go back into your design and rename
each of the assert_implication components according
to what ALUop the are testing (By default they are
give named U0, U1, U2, etc.)
Your ALU/Testbench should
not report any errors if both are working properly. If they do however, first check to see
whether or not the ALU logic actually contains a bug. If it does appear to be correct, then check
to see if a mistake could’ve been made with your verification logic.
Prove that the testbench is
doing its job by inserting a few intentional errors into your ALU design and
show one of the TA’s/Instructor that your testbench
is capable of catching this error.